QUI CUISINE : le prêt-à-manger chez vous
  • Accueil - Home

Cake salé - recette de base

4/12/2013

0 Comments

 
Picture

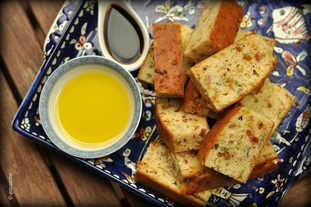
Le cake salé est simple à réaliser, et peut se décliner en une multitude de saveurs - excellent pour utiliser des petits restes de légumes, fromages et de viandes.

Délicieux servi au goûter, à l'apéro ou pour un petit déjeuner rapide !


Ingrédients (pour un moule standard carré de 8 pouces) :

3 œufs
150 g de farine
10 g de poudre à pâte
80 ml d'huile végétale (ou remplacer un 20ml par de l'huile d'olive pour agrémenter certaines saveurs)
125 ml de lait
sel et poivre au goût (mais attention au sel, car il faut doser avec la teneur en sel des condiments)

Condiments au choix : exemple, zucchini-oignons caramélisés-cheddar blanc, ou lardons-poireaux-gruyère, ou champignons-tomates séchées-chèvre. Quantité : à peu près un tiers de tasse de chaque ou selon votre préférence.

Méthode :
1. Chemiser le moule (beurre & farine) et préchauffer le four à 350F.
2. Faire cuire les condiments qui le nécessitent (ex. lardons, champignons, oignons caramélisés, la plupart des légumes, etc.) et les laisser refroidir.
3. Dans un grand bol, mélanger la farine, la poudre à pâte et le poivre/sel.
4. Incorporer les œufs un à la fois et ensuite l'huile.
5. Incorporer le lait et bien mélanger le tout.
6. Ajouter les condiments voulus, ainsi que le fromage râpé s'il y a lieu, et ajuster le sel/poivre/épices.
7. Couler dans votre moule et faire cuire environ 25-30 minutes, ou jusqu'à ce que la croûte soit bien dorée et que la pointe d'un cure-dents ressorte propre du centre du cake.
8. Laisser tiédir 15 minutes avant de démouler et de trancher le cake.


0 Comments

Pantry basics

4/12/2011

0 Comments

 
Is there anything worse than being in the mood to create that perfect something to satiate a craving, only to realize you've run out of the one impossible-to-substitute ingredient? Or to come home after a long day at work, peer into your cupboards and think "there's never anything to eat around here?"

Although building up your pantry can seem like an onerous (and expensive!) task if you undertake it all at once, adding one or two items at a time can slowly help you get to the point where all you'll ever need on a whim are fresh produce and specialty items.

Here is a list of my actual pantry contents, with suggestions for specialty items to add over time... I try to buy in bulk stores so that I can control the amount I need. Keep in mind that many seasonings lose their potency within six months once the package is open so it's better to buy less at a time.

Dry goods:
- onions, shallots, garlic, potatoes
- variety of dry beans (chick peas, lentils, white beans) as well as canned.
- canned whole tomatoes plus tomato paste (freeze the paste in ice cube containers and then pop them into a plastic freezer bag - perfect for last minute sauces)
- variety of starches (rice, couscous, bulgur, polenta, etc.)
- canned fish
- coconut milk
- canned artichokes, hearts of palm

Baking:
- all-purpose flour, plus specialty (semolina, buckwheat, whole-wheat, bran, etc,)
- dried fruit & nuts
- baking flour, baking soda, dry yeast
- white sugar, brown sugar
- cocoa powder

Condiments:
- olive oil, vegetable oil, plus specialty (nut oils, asian-style oils)
- white & red wine vinegar plus specialty (balsamic, cider, champagne, rice)
- soy or tamari sauce, hot sauce, fish sauce
- dijon mustard

Seasonings:
- My basics include sea salt, black & white pepper, cayenne, oregano, thyme, bay leaves, cinnamon, basil, cumin, curry blend, cloves, vanilla extract - and in the warmer months, I grow a few fresh herbs, too.
- I frequently use tarragon, lavender, herbes de provence, paprika, dried chilies, chinese five spice, star anise, raz hanout, garam masala - add anything else you love or are curious about!

In the fridge:
- milk, eggs, unsalted butter
- citrus fruit (lime, lemon, grapefruit)
- carrots, leek

In the freezer:
- various stocks (chicken, beef, fish). Great for soups, sauces, risottos, braised dishes, etc.
- tomato paste
- bread crumbs (made from old leftovers), Parmesan cheese and more butter!

There are always a minimum of five or six varieties of dark chocolate hanging around, waiting to be sampled. And, of course, wine is de rigueur! For the cooking, obviously.

0 Comments

Mayonnaise

4/12/2011

0 Comments

 
Picture
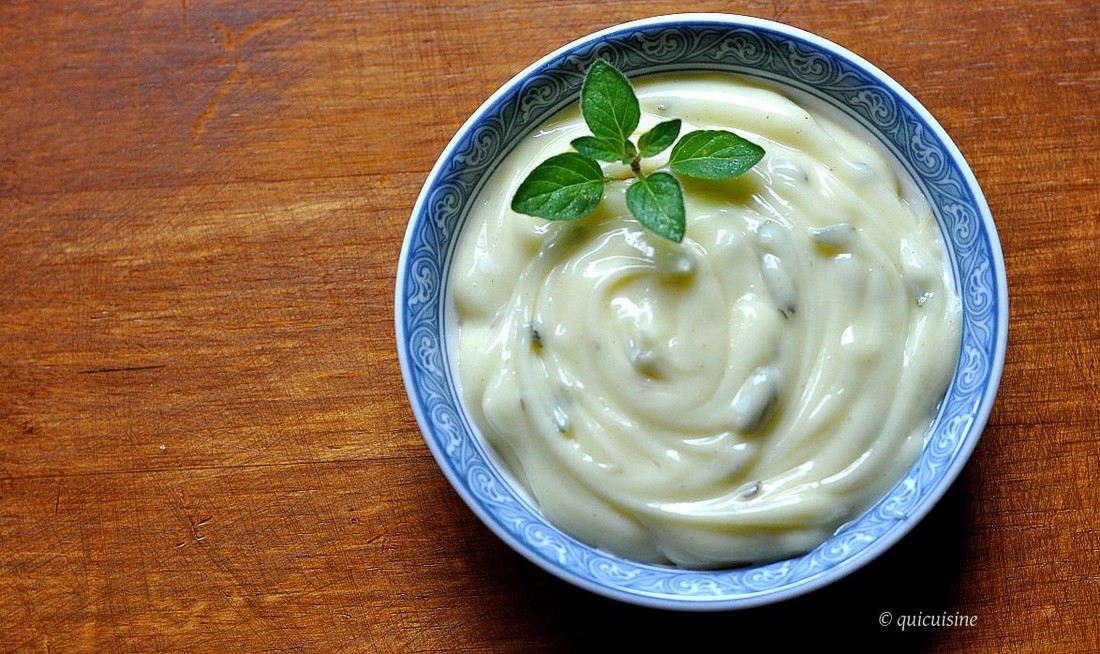
There is absolutely no comparison to be made between handmade and commercial mayonnaise, and not a week goes by that there isn't some new experimental version of it in my fridge. Contrary to my mayo-is-splitting-blender experiences growing up, I've discovered it's quite simple to make mayo by hand as long as you have a few key tools and ingredients, and just a little paaaatience...

Yield: varies on size of egg yolk to oil ratio, but about 3/4 cup.
Tools: a whisk (I use a silicone covered one which I love for this), and a stainless steel bowl

Ingredients: (should all be room temperature for the best emulsification results)
1 egg yolk
1 tsp. dijon mustard
1-2 tsp. white wine vinegar (and/or lemon juice)
pinch salt, pinch white pepper
175-200ml good quality vegetable-based oil, include 10-15ml olive oil in total amount if desired
(A medium-sized yolk has the capacity to emulsify about 180ml of oil, hence the variance above)
Optional: herbs, spices, sun-dried tomatoes, lime zest, etc.

Method:
1. Whisk egg yolk in a bowl, with dijon, vinegar, salt, pepper and a bit of lemon juice, if using, until well blended and frothy. If using powdered spice (curry, mustard powder), also add them now.
2. Place your bowl on a non-slip surface (a moist towel), or better yet, use the cook's trick: place your bowl in the rim of a slightly smaller saucepan or pot, with a kitchen towel in between. You want to have both hands free to be able to simultaneously whisk and pour the oil without having to stop to grab onto your whizzing bowl.
3. Pour the oil in a thin stream (almost a dribble) while constantly whisking; keep doing so until your mixture starts to thicken and take on that mayo consistency. Once your ingredients are well-emulsified, you may start to pour the oil a little faster until the desired consistency is achieved.
4. Add finely chopped fresh ingredients as desired (basil leaves and sun-dried tomatoes, capers and olives, etc.) and season to taste (add lemon juice, pepper, salt).

Notes on the oil:
Be sure to use the best possible oil as it makes a huge difference in the taste; peanut oil tastes the most neutral, but is more expensive than canola or sunflower, although there's not a huge difference in price if you buy organic/first-press types. Mayo made with 100% olive oil is too strong for my taste, so I generally just use a bit to enhance the overall flavour.


0 Comments

Pâte brisée (pastry dough)

4/12/2011

0 Comments

 
Everyone's got their own way of doing this, from my mom to my instructors in school to each celebrity chef - here's mine! I use this for quiche, galettes and even empanadas. You can add ground almonds (excellent with fruit tarts), dried herbs, and citrus zest to liven things up.

Yield: one quiche/galette shell, or about 2 dozen empanadas.

Ingredients:
60g cold butter, cut into small chunks
125g all-purpose flour
1 whole egg
1-2 tbsp. cold water
pinch fine sea salt
for sweet pastry: 25g white sugar

Method:
1. Blend flour, salt and sugar, if using.
2. Mix in butter with fingertips until a coarse, grainy consistency is achieved (this is know as "sabler la pâte" in French)
3. In separate bowl, blend whole egg with 1 tbsp. cold water.
4. Gently blend into flour/butter mix with fingers until a ball forms. You don't want to over knead as this will melt the butter packets and result in a tough dough.
5. Shape into a disk, wrap and refrigerate overnight (although in a pinch, an hour or so is better than nothing).
6. When ready for use, remove from fridge, roll into desired shape and blind-bake (use pie-weights or rice) at 325F until golden (anywhere from 20-30 minutes).

0 Comments

    About me

    Cook, explorer, teacher.
    I love to share my food experiences with others and hope to convert a few neophytes in the process.

    Les recettes sont généralement disponibles uniquement en anglais, mais je serai ravie de vous répondre en français !


    Archives

    April 2016
    May 2013
    April 2013
    December 2011
    November 2011
    April 2011


    Categories

    All
    Basics
    Breakfast
    Cookies
    Desserts
    Dough
    Quick
    Sauces
    Tips
    Welcome Message

    RSS Feed

Powered by Create your own unique website with customizable templates.

Qui Cuisine Accueil
Qui Cuisine © 2013 Personal Chef Services - Chef à domicile

All photos & text on this website are the property of Qui Cuisine, unless otherwise indicated. Please ask for permission to reproduce. Photo credit: Marielle Albert, Christele Albert